
Best How-To Guide to Building a Backyard Pond
In this article, we take you step-by-step through the process, and show you just how easy it is to transform your outdoor living space, using an Aquascape DIY Backyard Pond Kit. You can also follow along with the corresponding video:.
This technique is perfect for the 6’ x 8’ Pond Kit, the 8’ x 11’ Pond Kit, and even the 11’ x 16’ Pond Kit.
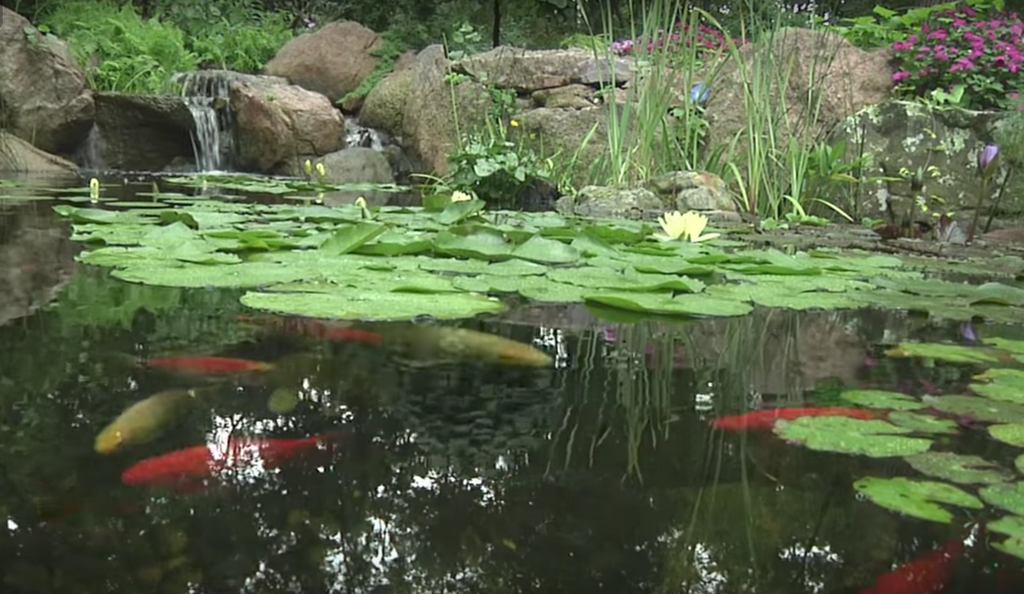
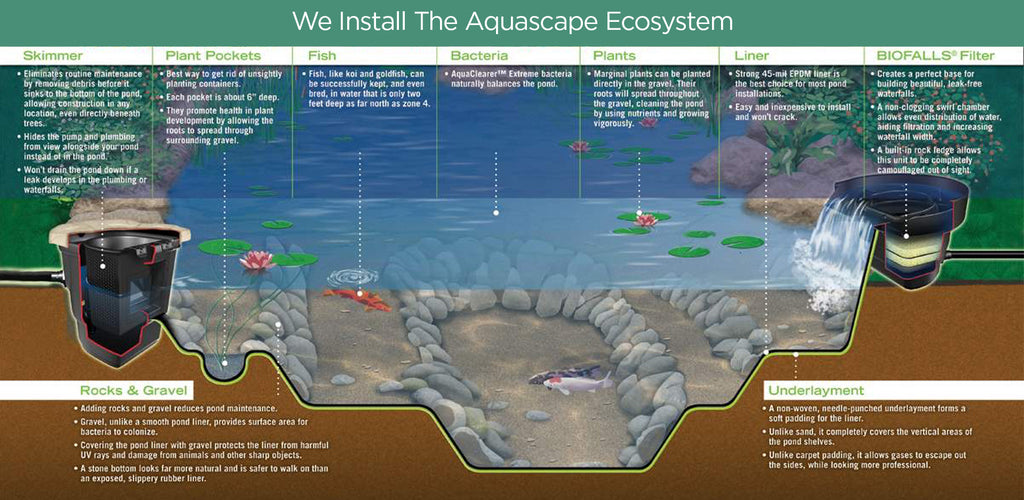
All Aquascape pond kits are built using an ecosystem approach to ponds or water gardens. Creating a well-balanced ecosystem will reduce maintenance, support healthy fish and plants, and work with Mother Nature, to transform your backyard into a water garden paradise.
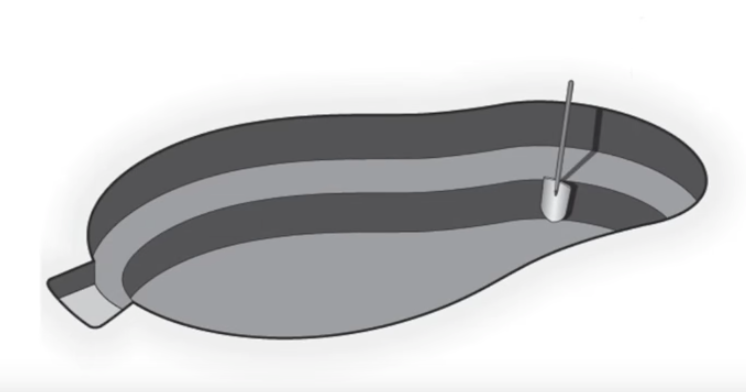
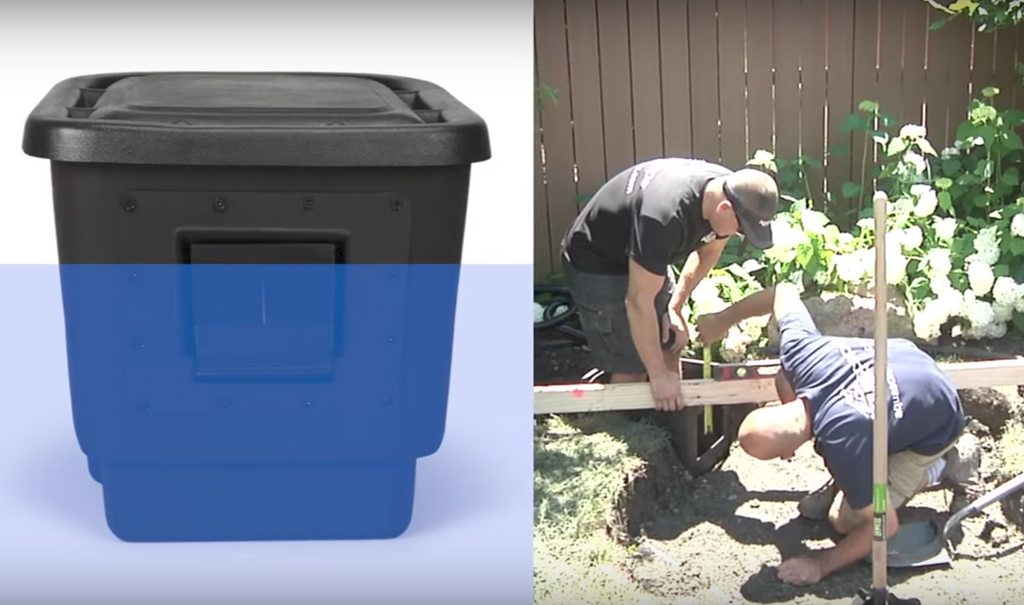
The first step in building an ecosystem pond is to determine an appropriate location for your new water feature. Use a garden hose and brightly colored spray paint to lay out the desired shape on the ground, keeping in mind that irregular shapes will look more nature. Use a tape measure to check the maximum dimensions of your design to make sure you’ll have enough pond liner. Then, mark out the pond using a can of spray paint, and remove the hose to reveal a precise template for your excavation.

Place your two filter components - that consist of a surface Skimmer and Biofalls - along the perimeter of the pond. We recommend placing these at opposite ends of the pond, to ensure proper water circulation. When you position the filters it’s also important to take into consideration what will look best from the main viewing areas, both inside and outside of the home.

Filtration
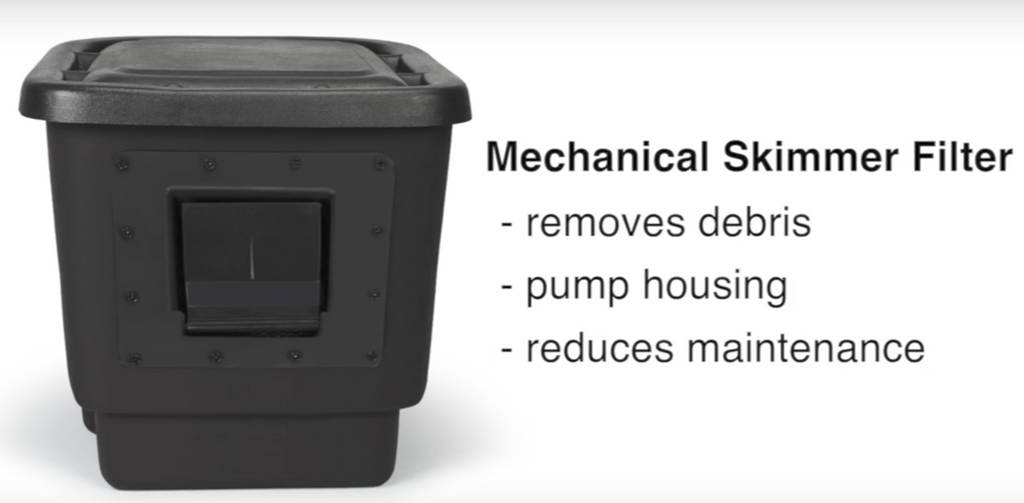
The Skimmer is a mechanical filter that removes floating debris from the surface of your pond. It also houses the pump to prevent clogging and drastically reduces maintenance.
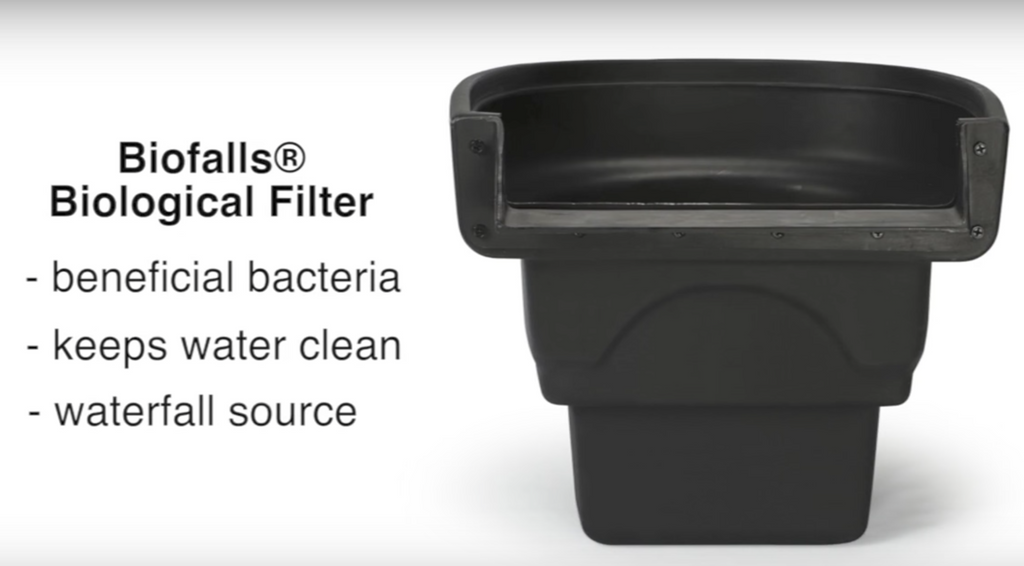
The BioFalls is a biological filter that not only supports colonies of beneficial bacteria, but helps to keep your water clean and clear. It also makes a great start to any waterfall.
Prepare the BioFalls prior installation by installing the bulkhead fitting provided, through the hole found at the back of the filter. Unscrew the bulkhead and insert the threaded adapter with the rubber washer on the inside of the filter. Place the plastic washer and nut on the adapter, and use a pair of channel lock pliers to tighten down the fitting, creating a watertight seal. A couple turns past hand-tight should do the trick.
The silicone provided in the kit should be used around the fitting thread when connecting the bar type fitting to the bulkhead. This will assure you that there will be no leaks in the plumbing connection.
Kink-free hose is used to connect the filters and transfer the water from the skimmer to the waterfall, via the waterfall pump. Place the metal clamps over the kink-free hose before securing it to the barb fitting. Hot water can be used to soften the hose if the initial connection proves to be too difficult. Once secure, tighten down the clamps with a screwdriver, and prepare to set the filter in its final position.
Compact the soil with a tamper or heavy flat surface like a concrete block to avoid future settling, and then reposition the filter so that it sits level side-to-side, and leaning slightly forward (it should be about a quarter of a bubble on the level).
Once set, put weight on the filter and use dirt to backfill around the sides and back of the unit to help lock it in place. Burying the hose during excavation, rather than after, will save you the time and energy of digging up the berm to trench the pipe later.
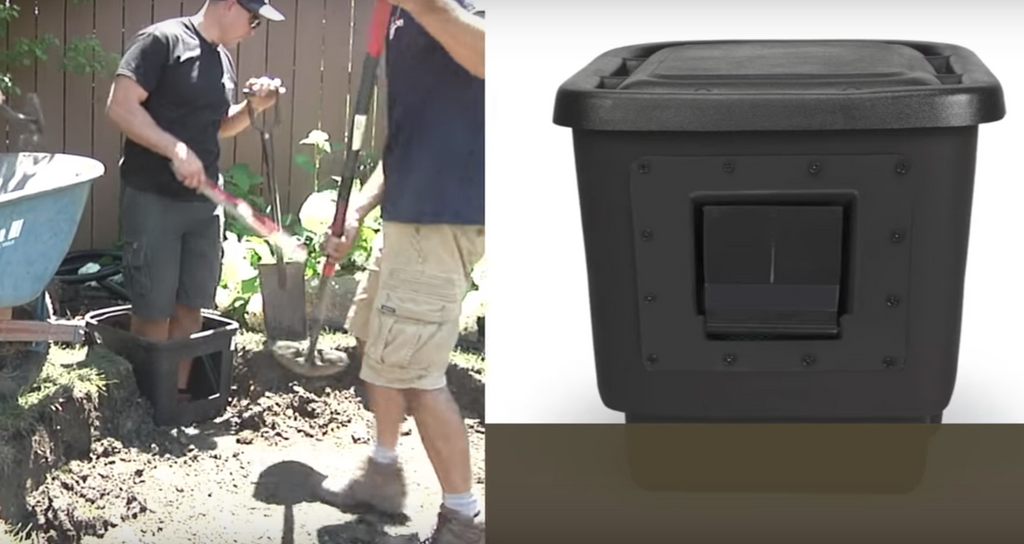
You can now start excavating the pond. Start by digging the first shelf of the pond approximately 8-10 inches down. Your total depth should still end up around 24 inches, or as specified by your pond kit instructions. Start in the middle and use the excavated soil to build a berm around the BioFalls filter. Avoid creating something that looks like a volcano, by creating a large, fanned out berm that will help blend the filter into the surroundings.
Be sure to compact the soil in the berm with a hand tamper periodically to avoid future settling. Once the first shelf is dug, prepare to set the skimmer by marking around the filter and digging down approximately 18 inches. Use a long board, bubble level and tape measure to help determine your water level and the pond depth. The water level should be set at 1-½” to 3” below the outer perimeter of the pond. A patio or main viewing area are often good places to use as a benchmark for setting water levels.
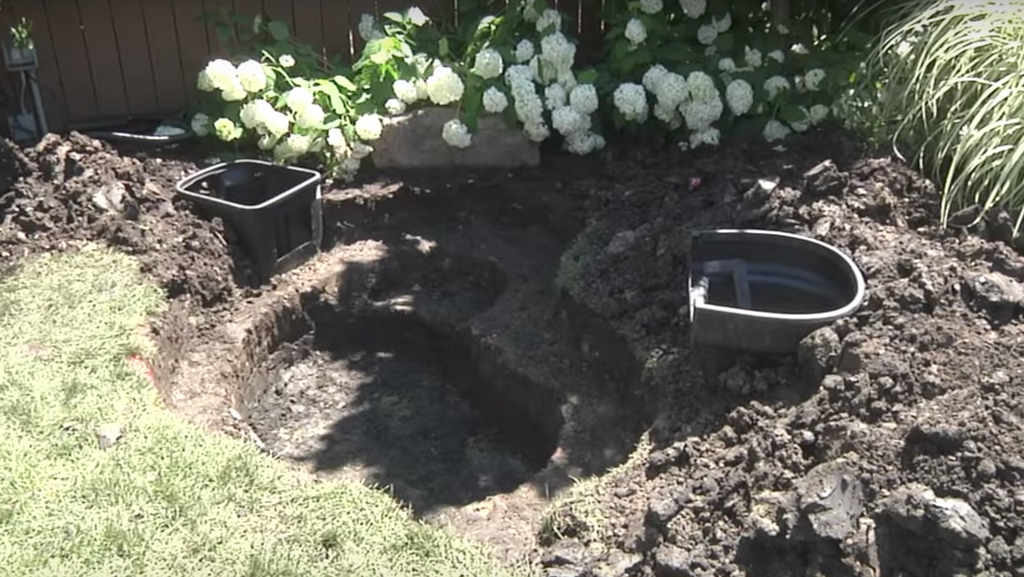
Once the water level in the pond has been determined, you can set the skimmer accordingly. The skimmer height is determined by the opening on the front of the unit. Proper water level will rest roughly one inch below the top of the opening on the front of the skimmer face.
Be sure to tamp the ground beneath the skimmer to create a solid level base and avoid future settling. In order to function properly, the unit should sit level side-to-side, as well as front-to-back. Once level and set to the proper height, based on your water level, backfill around the filter with loose soil while standing inside the unit, to prevent it from shifting.
Reset the level after backfilling, and be sure that the depth of the shelf in front of the skimmer is several inches lower than the bottom of the base plate opening.
Proceed to mark out and dig the second shelf of the pond by excavating down another 8”-10”. Avoid following the exact contour of the first shelf to help naturalize the feature. Design in a fish feeding area by cutting in one of the shelves close to the main viewing area, or create a wide shelf along the back wall for a strategically placed area for aquatic plants to sit.
There are no limits to your design. Just be sure that the vertical walls are cut straight, for the ease of rock placement and structural integrity. The pond shelves should be flat and level to handle the rock and gravel that will rest on them. An optional third shelf can be excavated, as long as you don’t exceed the maximum pond pit depth of 24 inches.
Once excavation is complete, prepare to install the underlayment and liner, by cleaning up any rocks or debris remaining on the bottom of the pond.
The underlayment is a thick woven fabric that protects the pond liner from puncture. It also helps alleviate hydrostatic pressure caused by groundwater trapped underneath the pond. Unfold the fabric and cover the surface of the pond. Conform it to the pond shelves by starting at the bottom and working your way up to the top. Next, bring in the fish-safe EPDM rubber pond liner. Much like the underlayment, start at the bottom and pull down the liner and conform it to the pond shelf, doing your best to remove any large folds in the liner along the way.
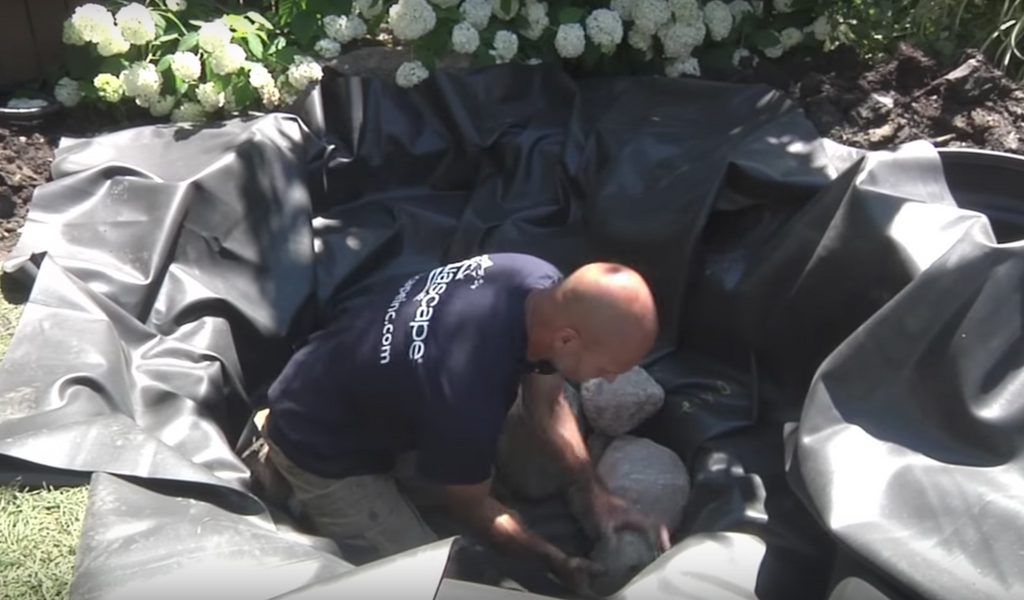
Be aware that the liner and underlayment dimensions are specific to the kit size, with the maximum pond depth of 24”. Once the liner is set in place, you can begin to rock in the pond bottom, by placing boulders along the vertical walls of the pond floor. Start at the bottom and use a variety of sizes of stone as you stack rocks in the pond, much like building a stone retaining wall.
If a boulder doesn’t fit, flip it, turn it and twist it in place. And if it still doesn’t fit, set it aside and try a different one that will lock in place. Be sure the tops of the stacked boulders sit higher than the top of the vertical walls, in order to retain the gravel on the shelf. Continue to work your way up from the bottom, making sure stone walls are stable you go.
Consider the waterfall while locking in the pond, and use larger stones to frame out a waterfall to point into the pond. Before you finish rocking in the pond, you’ll have to hook up the skimmer. Pull the liner up to the face of the skimmer, leaving slack at the bottom, and use your finger or a screwdriver to trace out the skimmer opening. Using the trace line as a guide, cut out the section of liner using a utility knife or pair of scissors, 1-½” inside of the mark. Rounding the corners of the cut out will prevent the liner from tearing once stretched. Insert the skimmer faceplate through the cutout and stretch the liner firmly around the component, making sure that the holes in the skimmer weir door are at the bottom of the liner when installed. Temporarily attach the liner to the front of the skimmer by lining up the top corner screws of the faceplate. Unthread the screws and pull back the liner to re-expose the skimmer opening. Wipe down the face of the skimmer and the back side of the liner around the faceplate to remove any dirt or dust. Use a thick bead of silicone over the screw inserts, then permanently re-attach it to the skimmer by lining up the previously set screws.
Install the four corner screws first, and then the rest in any order you choose. Complete the installation by tightening down the screws to form a watertight seal around the skimmer faceplate. Once the skimmer is sealed, finish rocking in the pond, and use a thin layer of gravel to cover the liner on the pond floor and shelves. The gravel can also be used to fill any voids between the rocks and provides extra stability to the pond wall.
Rock and gravel in your pond will also help keep your water feature clean, by providing extra surface area for beneficial bacteria to colonize and grow.
With the larger framing rocks set in place, prepare to attach the liner to the BioFalls filter. Much like installing the skimmer faceplate, temporarily attach the liner to the BioFalls, with the snout and screws provided. Once the top corner screws are lined up, pull the liner back and remove any dirt or dust from the face of the BioFalls and the back of the liner.
Use a thick bead of silicone over the screw inserts and permanently re-attach the liner by installing the snout to the BioFalls. The top corner screws should be lined up and installed first, and then the rest in any order you choose.
Once sealed, you can cut the excess liner from the BioFalls spillway, and finish building the main waterfall of your feature. Larger framing rocks should be to cover the sides of the BioFalls, and smaller stones can fill in the gaps in between.
Flat stones will create a sheet type waterfall, and round stones will create more of a rapids look. Once the waterfall is constructed, black waterfall foam is used to fill in the gaps and voids between the rocks, and keep the water flowing visibly over the rocks. Allow the foam time to cure before molding it in place. Use gravel and rocks to help disguise the foam before it fully cures and hardens. Additional topsoil isn’t always necessary, but proves to be useful for dressing up your berm. Plus the nutrient-rich soil provides a nice base for your plants, trees and shrubs.
Finish off your berm by building a retaining wall ties everything together. Cut the berm back to expose the dirt wall and put some larger boulders in place. Once set, backfill the boulders and add landscaping to help soften the edges. Use a garden hose to rinse down the stones from to to bottom, and remove the dirty water with pond pump and extra hose from the kit. Once the pond has been rinsed down a few times and the dirty water removed, pull the pump and begin to fill the pond. Trim the excess liner around the pond and leave approximately 6” for edging. Dig a small trench behind the perimeter boulders and fold the liner down against them; backfilling the trench with loose soil and compacting the dirt to avoid settling.
Gravel can be used around the edges pond, to help transitioning to the landscape, but avoid the unnatural look of a solid gravel edge around the entire perimeter.
Before the pond is filled, you will need to hook up the pump and plumbing, inside of the skimmer. Prepare to hook up the pump by running the plumbing into the open side port of the skimmer. Drop the pump into the skimmer and determine the amount of pipe you will need to connect the plumbing. Cut the pipe and connect the pump to the plumbing with the use of bar hose adapter, and rotational ball fitting included.
Once the pump is installed, run the electrical cord out of the unused side port. Complete the installation by inserting the skimmer debris net, and covering the unit with the lid provided. Before turning on the waterfall, remove any dirt or debris from the BioFalls, and place the filter pads into the unit with rocks to weight them down. Optional media like BioBalls can also be added at this time for additional filtration.
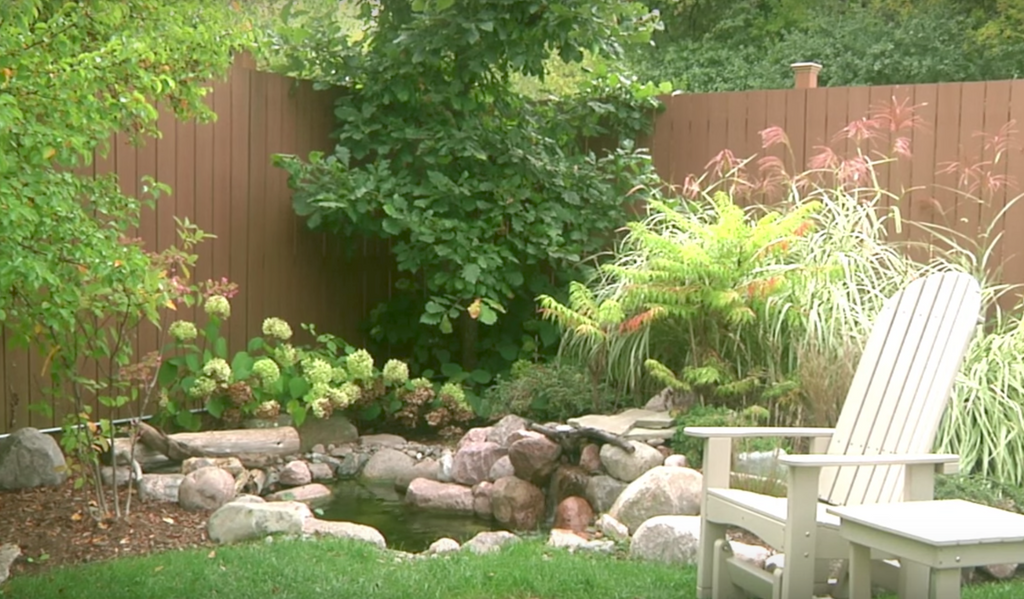
You’re finally ready to plug in the pump and see your new pond come to life. Withan Aquascape DIY Backyard Pond Kit, You can transform any landscape into an aquatic paradise.
Don't Take Our Word For it! Here's What Our Customers Think:
-

“★★★★★
We wanted a pond fountain. Kinetic Water Features was very helpful, patiently explained all the options and even created a mock up showing the various sized fountains on a picture we gave them of our pond. They helped us find the perfect fountain. ” - Sarah P. -

“★★★★★
Great service! My experience with Kinetic was fabulous. Answered all my questions patiently. The fountain they helped me pick was perfect for my pond. ” - Daniel A. -

“★★★★★
The Large Pond Kit we bought has worked out perfectly. The customer service by Kinetic Water Features was outstanding as well. ” - The Martinez Family


